
Over 60 percent of American households now use some form of home fragrance device, yet many struggle to achieve the perfect balance of scent and style. The right setup for your diffuser can make a dramatic difference in your living space, enhancing comfort while protecting your investment. Discover practical, American-friendly tips that help you create a consistently fresh and inviting home, all while ensuring your diffuser works at its best.
Table of Contents
- Step 1: Choose the Right Location for Your Diffuser
- Step 2: Prepare the Diffuser and Add Fragrance Oil
- Step 3: Assemble the Diffuser Components Properly
- Step 4: Adjust and Activate Your Diffuser
- Step 5: Check Scent Quality and Maintain Regularly
Quick Summary
| Key Point | Explanation |
|---|---|
| 1. Position Diffuser at Proper Height | Place your diffuser on a stable surface approximately 1.1 to 1.4 meters high for optimal scent distribution. |
| 2. Use Quality Essential Oils | Select high-quality oils to ensure a pleasant, long-lasting fragrance in your space. |
| 3. Clean Your Diffuser Regularly | Maintain your diffuser by cleaning it weekly with a vinegar solution to prevent residue buildup. |
| 4. Adjust Reed Quantity and Position | Experiment with the number and placement of reeds to achieve your desired scent strength and coverage. |
| 5. Protect Surfaces from Oil Drips | Use a coaster or plate under your diffuser to avoid damage from any oil leaks. |
Step 1: Choose the Right Location for Your Diffuser
Setting up your diffuser in the perfect spot can transform your home’s atmosphere and maximize fragrance distribution. Your goal is to find a strategic location that allows essential oils to spread evenly while protecting your diffuser from potential damage.
Consider placing your diffuser on a stable surface at breathing height such as a console table, shelf, or side table positioned slightly away from direct foot traffic. Aim to position the device approximately 1.1 to 1.4 meters high, which allows the aromatic mist to disperse naturally at nose level. Critically, avoid spots near direct sunlight, heating vents, or air conditioning units that could disrupt fragrance flow or potentially harm your device.
A smart placement strategy involves selecting areas with gentle air circulation that can help distribute the scent without creating drafts. For instance, a corner table in your living room or a side table near seating areas works perfectly. Always ensure the surface is flat, stable, and can withstand potential moisture from the diffuser. Keeping the device away from electronics, delicate fabrics, or wooden surfaces that might suffer water damage is key to maintaining both your home decor and diffuser functionality.
Step 2: Prepare the Diffuser and Add Fragrance Oil
Preparing your diffuser is a straightforward process that will help you create an inviting home atmosphere with perfectly distributed fragrance. The key is to follow a careful method that ensures optimal oil absorption and scent dispersion.
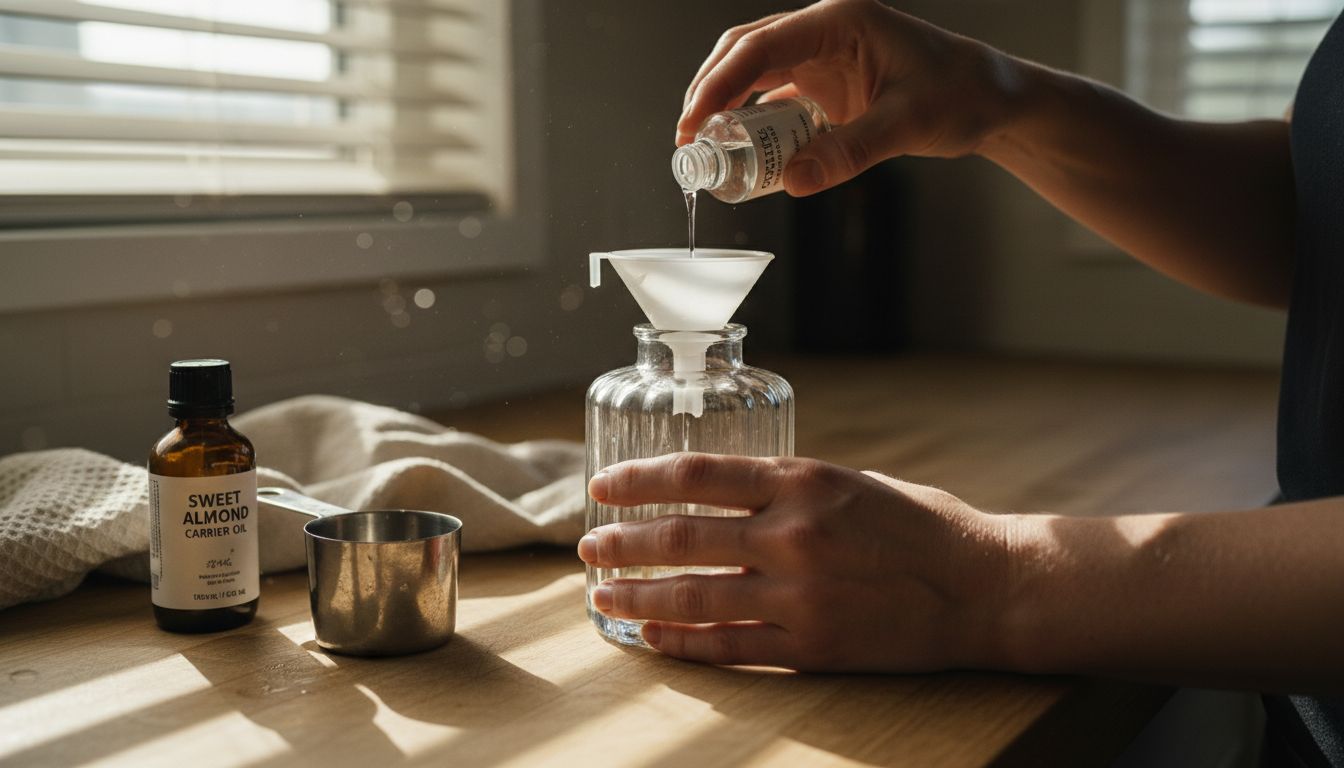
Start by thoroughly cleaning and drying your diffuser vessel to remove any previous residue that might interfere with your new fragrance. Measure out your carrier fluid carefully about 1/3 cup into a clean container, then add 30 to 50 drops of essential oils depending on the intensity you want to achieve. Gently stir the mixture to ensure even distribution of the oils.
When adding the fragrance to your diffuser, use a small funnel to prevent spills and carefully pour the mixture into the vessel. Insert 6 to 8 reeds, allowing them to soak for 20 to 30 minutes before flipping them to initiate fragrance release. Pro tip: place your diffuser on a protective coaster or small plate to guard against any potential oil drips that might damage furniture surfaces. This simple preparation will set the stage for a beautifully fragrant home environment that welcomes you with delightful scents.
Step 3: Assemble the Diffuser Components Properly
Assembling your diffuser correctly is crucial for ensuring optimal fragrance performance and longevity. Precision in this step will help you create a consistently pleasant home environment that delights your senses.
Carefully examine all the components of your diffuser before beginning. Follow the recommended process of inserting 6 to 8 reeds into the fragrance vessel, making sure they are fully submerged in the liquid. Allow the reeds to soak for 20 to 30 minutes, which enables them to absorb the fragrance mixture thoroughly. After this initial soaking period, gently flip the reeds to expose the saturated ends and initiate fragrance release.
Position your assembled diffuser on a stable surface away from direct sunlight, heating sources, and air drafts to maintain consistent scent distribution. Consider using a protective coaster or small plate underneath to prevent any potential oil drips from damaging furniture surfaces. By taking these careful steps, you will create a beautifully fragrant atmosphere that welcomes you home with delightful, carefully curated scents.
Step 4: Adjust and Activate Your Diffuser
With your diffuser assembled and ready, the final step involves fine tuning its performance to create the perfect aromatic atmosphere in your home. Understanding how to control and optimize your diffuser will help you maximize its effectiveness and enjoyment.
Strategically adjust the diffuser settings to control fragrance intensity and distribution based on your space and preferences. Start by selecting a moderate fragrance setting that provides consistent but not overwhelming scent coverage. If you are preparing for a special event, consider priming the room 20 to 30 minutes beforehand by lightly spraying along curtains or entry areas to create a welcoming fragrance trail.
Keep your fragrance profile simple and balanced by focusing on one primary scent with perhaps a subtle accent note. This approach prevents sensory overload and ensures a more pleasant olfactory experience. Pay attention to how the fragrance spreads through your space and adjust the reed positioning or number of reeds to achieve your desired scent strength. Experiment with different configurations until you find the perfect balance that transforms your home into a sanctuary of delightful aromas.
Step 5: Check Scent Quality and Maintain Regularly
Maintaining your diffuser is crucial for ensuring consistent fragrance performance and extending the life of your aromatherapy device. Regular care will help you preserve the quality of your home’s ambient scent and prevent potential issues with your diffuser.
Implement a consistent cleaning routine to keep your diffuser operating at peak efficiency. After every use or at least once a week, thoroughly clean the device by mixing equal parts white vinegar and water in the reservoir. Run this solution through the diffuser for 15 to 30 minutes, then rinse completely with clean water. This process removes any lingering oil residue and prevents mineral buildup that could compromise your device’s performance.
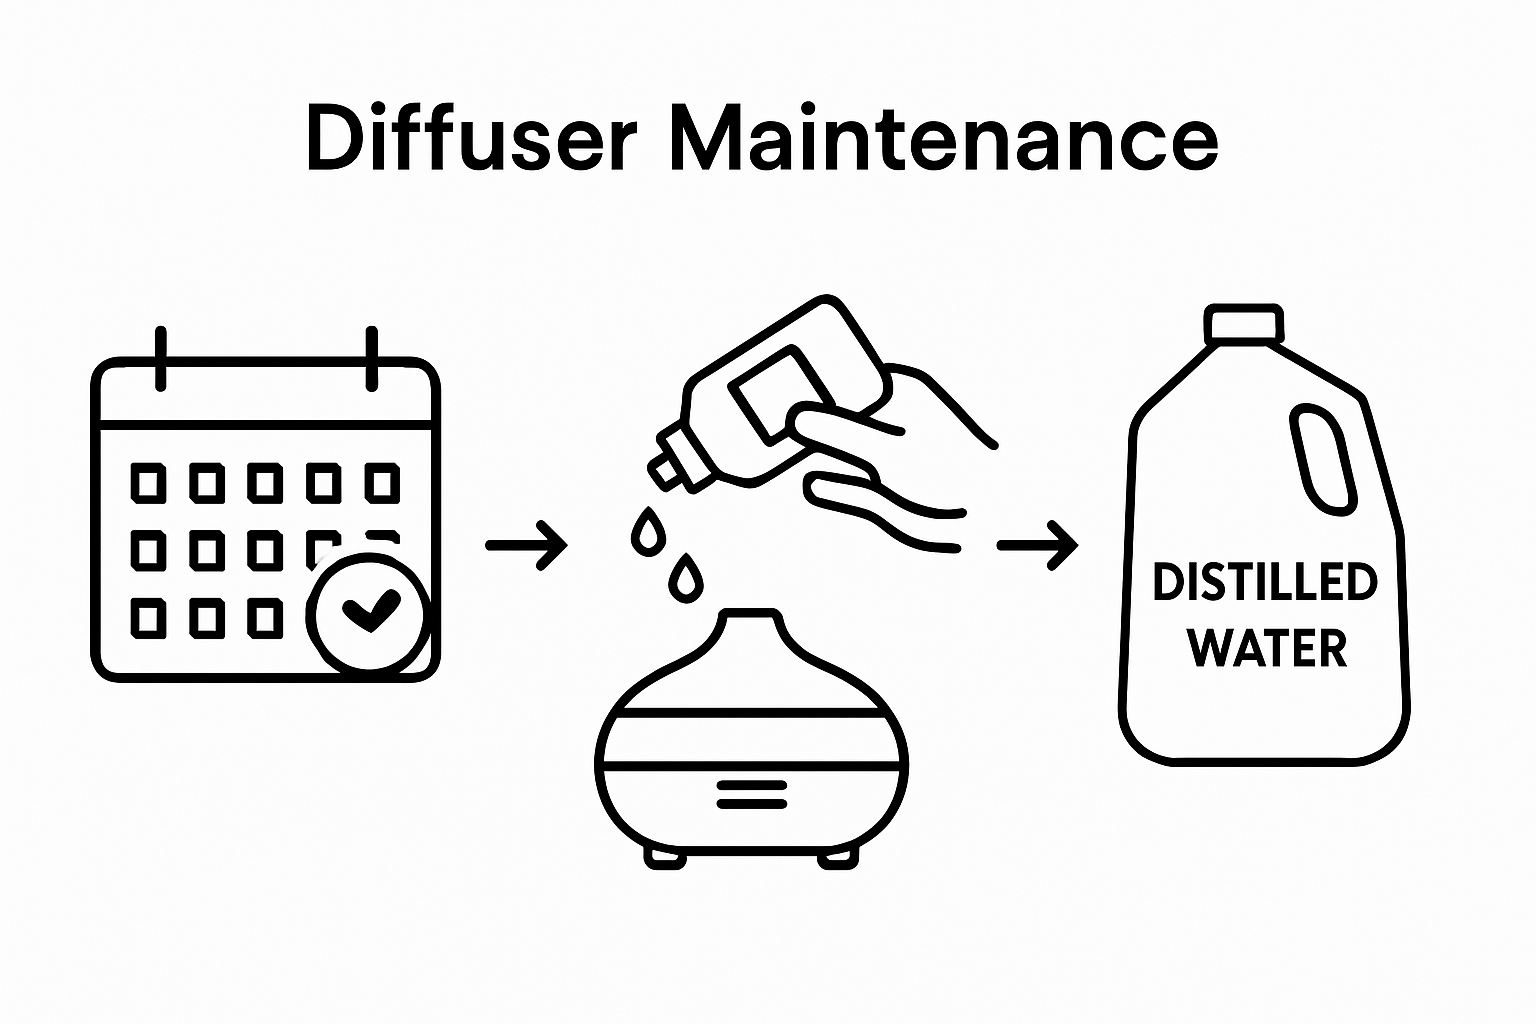
When selecting water for your diffuser, opt for distilled or purified water to minimize potential mineral deposits. Pay attention to the quality of your essential oils and replace them when their fragrance becomes weak or stale. Monitor the scent intensity and reed saturation regularly, and be prepared to adjust or replace the reeds every few months to maintain optimal fragrance distribution. By investing a few minutes in routine maintenance, you will ensure your diffuser continues to create a welcoming and refreshing atmosphere in your home.
Elevate Your Home Ambiance with the Perfect Diffuser Setup
Setting up a diffuser correctly can be challenging when you want just the right fragrance balance and lasting scent in your living space. If you have struggled with diffuser placement, scent intensity, or maintaining consistent fragrance, know that you are not alone. The article shows how simple adjustments like choosing the right location, assembling reeds properly, and regular upkeep unlock the full power of your diffuser for a welcoming home atmosphere.
Discover premium options in our Diffusers – Aromel collection designed to offer effortless home fragrance tailored to your style. Our Reed Diffusers – Aromel come with thoughtfully curated essential oils and elegant designs.

Bring home your ideal scent today and experience the calming and uplifting effect of expertly crafted aromas. Explore exclusive discounts and take advantage of free shipping on orders over $50 at Aromel Scents. Start your journey to a beautifully fragrant space now by visiting our Bundles – Aromel page for beautifully paired diffuser sets that make setup and refresh effortless.
Frequently Asked Questions
How do I choose the best location for my diffuser?
To choose the best location for your diffuser, place it on a stable surface at breathing height, about 1.1 to 1.4 meters high, away from direct sunlight and heating vents. Aim for areas with gentle air circulation, like a corner table near seating, to ensure even scent distribution.
What steps do I need to take to prepare my diffuser before adding fragrance oil?
Prepare your diffuser by thoroughly cleaning the vessel to remove any residue. Then, mix about 1/3 cup of carrier fluid with 30 to 50 drops of essential oils before carefully pouring the mixture into the diffuser.
How should I assemble the components of my diffuser?
Assemble the diffuser by inserting 6 to 8 reeds into the fragrance vessel, ensuring they are fully submerged. Allow the reeds to soak for 20 to 30 minutes, then flip them to start releasing the fragrance into your space.
How can I adjust my diffuser to achieve the right scent strength?
Adjust your diffuser’s settings to control the fragrance intensity, starting with a moderate level to avoid overwhelming the space. Experiment with reed positioning or the number of reeds until you find the perfect balance for your desired scent strength.
How often should I maintain and clean my diffuser?
Regularly maintain your diffuser by cleaning it at least once a week with a solution of equal parts white vinegar and water. Rinse thoroughly after running the solution for 15 to 30 minutes to prevent oil residue and mineral buildup.
How can I tell when it’s time to replace my essential oils or reeds?
Replace your essential oils when the fragrance becomes weak or stale, and check the reeds every few months for saturation. A good rule of thumb is to monitor the intensity and replace reeds if they no longer adequately disperse the scent.