
Most American homeowners agree that crafting your own scented candles offers a unique blend of luxury and savings. With over 60 percent of American adults now choosing home fragrance projects instead of store-bought gifts, the appeal of affordable yet personalized aromatherapy is stronger than ever. Discover how simple workspace organization, careful ingredient selection, and professional blending techniques bring premium candle making into your everyday routine—perfect for self-care or thoughtful gifting.
Table of Contents
- Step 1: Set Up Your Candle Mixing Workspace
- Step 2: Select and Measure Wax and Wicks
- Step 3: Choose and Blend Fragrance Oils
- Step 4: Pour and Mold Your Scented Candles
- Step 5: Test and Refine Your Candle Scents
Quick Summary
| Key Insight | Explanation |
|---|---|
| 1. Create a Safe Workspace | Choose a ventilated area with stable surfaces, keeping tools organized and safety equipment accessible. |
| 2. Select Proper Wax and Wicks | Choose wax types like soy or beeswax and match wicks to your container size for even burning. |
| 3. Blend Fragrance Oils Thoughtfully | Use safe, candle-specific oils in a 30-50-20 ratio for a balanced scent profile—experiment carefully. |
| 4. Pour and Cool Candles Carefully | Use silicone molds, maintain wax temperature, and avoid air bubbles during pouring to ensure quality. |
| 5. Test Candles Thoroughly | Conduct burn tests to measure performance metrics like melt pool and scent throw, documenting results for future reference. |
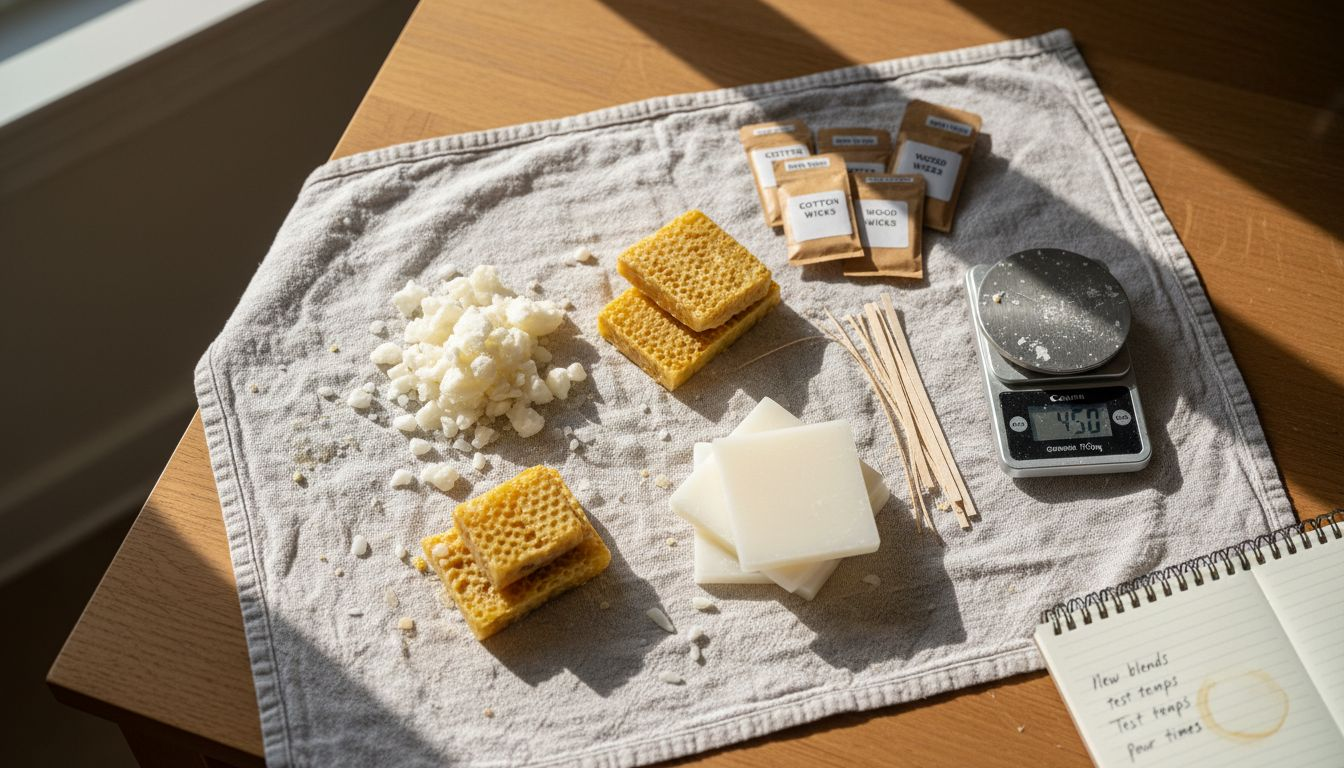
Step 1: Set Up Your Candle Mixing Workspace
Creating a dedicated workspace is the foundational step for successful candle mixing. You will want to select a well-ventilated area with stable, heat-resistant surfaces that can accommodate your candle-making project. Proper workspace organization involves setting up distinct zones for each stage of your candle production.
Start by choosing a spacious kitchen or craft area with a flat countertop that can handle potential wax spills. Cover your workspace with disposable protective materials like kraft paper or silicone mats. Gather all essential tools within arm’s reach: double boilers, thermometers, pouring pitchers, stirring utensils, and safety equipment like heat-resistant gloves and protective eyewear. Arrange these items systematically to create an efficient workflow that minimizes interruptions and maximizes safety.
Ensure your workspace has excellent ventilation by opening windows or using fans to circulate air, which helps manage wax fumes and maintain a comfortable temperature. Position your work area away from flammable materials and keep a fire extinguisher nearby as an additional safety precaution.
Pro Tip: Invest in a dedicated rolling cart or movable tray to keep your candle-making supplies organized and easily transportable between your workspace and storage area.
Step 2: Select and Measure Wax and Wicks
Choosing the right wax and wicks is crucial for creating high-quality scented candles that burn evenly and produce beautiful fragrance. When selecting materials, you will want to consider multiple factors including wax type, wick size, and compatibility with your specific candle design. Candle selection requires careful consideration to ensure optimal performance.
For wax selection, you have several options including soy wax, paraffin, beeswax, and blended waxes. Soy wax works well for most home candle makers because it burns cleanly, has excellent scent throw, and is environmentally friendly. Measure your wax carefully using a digital kitchen scale to ensure precise weight measurements. Most candle recipes recommend using a 1:1 ratio of wax to container volume, but this can vary depending on your specific project.
Here’s a comparison of common candle wax types to help you select the best fit:
| Wax Type | Burn Cleanliness | Scent Throw Strength | Eco-Friendliness |
|---|---|---|---|
| Soy | Very clean | Strong and lasting | Biodegradable, renewable |
| Paraffin | Moderately clean | Very strong | Petroleum-based, less eco |
| Beeswax | Very clean, natural | Light to moderate | Natural, supports bees |
| Blended | Varies by formula | Balanced performance | Depends on ingredients |
When choosing wicks, consider the diameter of your container and the type of wax you are using. Cotton wicks work best for most home candle projects and come in various sizes marked by numbers indicating thickness. Select a wick that is proportional to your container width to guarantee even burning and prevent tunneling. Typically, wider containers require multiple or thicker wicks to ensure consistent melting across the entire surface.
Pro Tip: Always purchase a few extra wicks in different sizes to test and ensure you select the perfect match for your specific candle design.
Step 3: Choose and Blend Fragrance Oils
Blending fragrance oils is an exciting art that transforms your homemade candles from simple wax objects into complex sensory experiences. Understanding how to select and layer fragrance notes will help you create unique and captivating scent profiles that delight the senses.
Start by selecting candle-safe fragrance oils specifically designed for heat stability. Professional candle makers recommend a classic blending ratio of approximately 30% top notes, 50% middle notes, and 20% base notes. Top notes provide the initial burst of scent and include lighter fragrances like citrus or herbal aromas. Middle notes form the heart of your fragrance and might include floral or fruity scents. Base notes like vanilla, sandalwood, or musk provide depth and longevity to your candle’s overall fragrance profile.
To begin blending, use small pipettes and testing strips to experiment with different combinations. Mix your chosen oils in tiny batches, carefully documenting the exact ratios and your impressions. Remember that some fragrance oils work better with specific wax types, so pay attention to compatibility. Start with familiar scents and gradually become more adventurous as you develop your blending skills.
Pro Tip: Create a dedicated fragrance blending journal to track your experiments, noting exact oil ratios, wax types, and how each blend performs when burned.
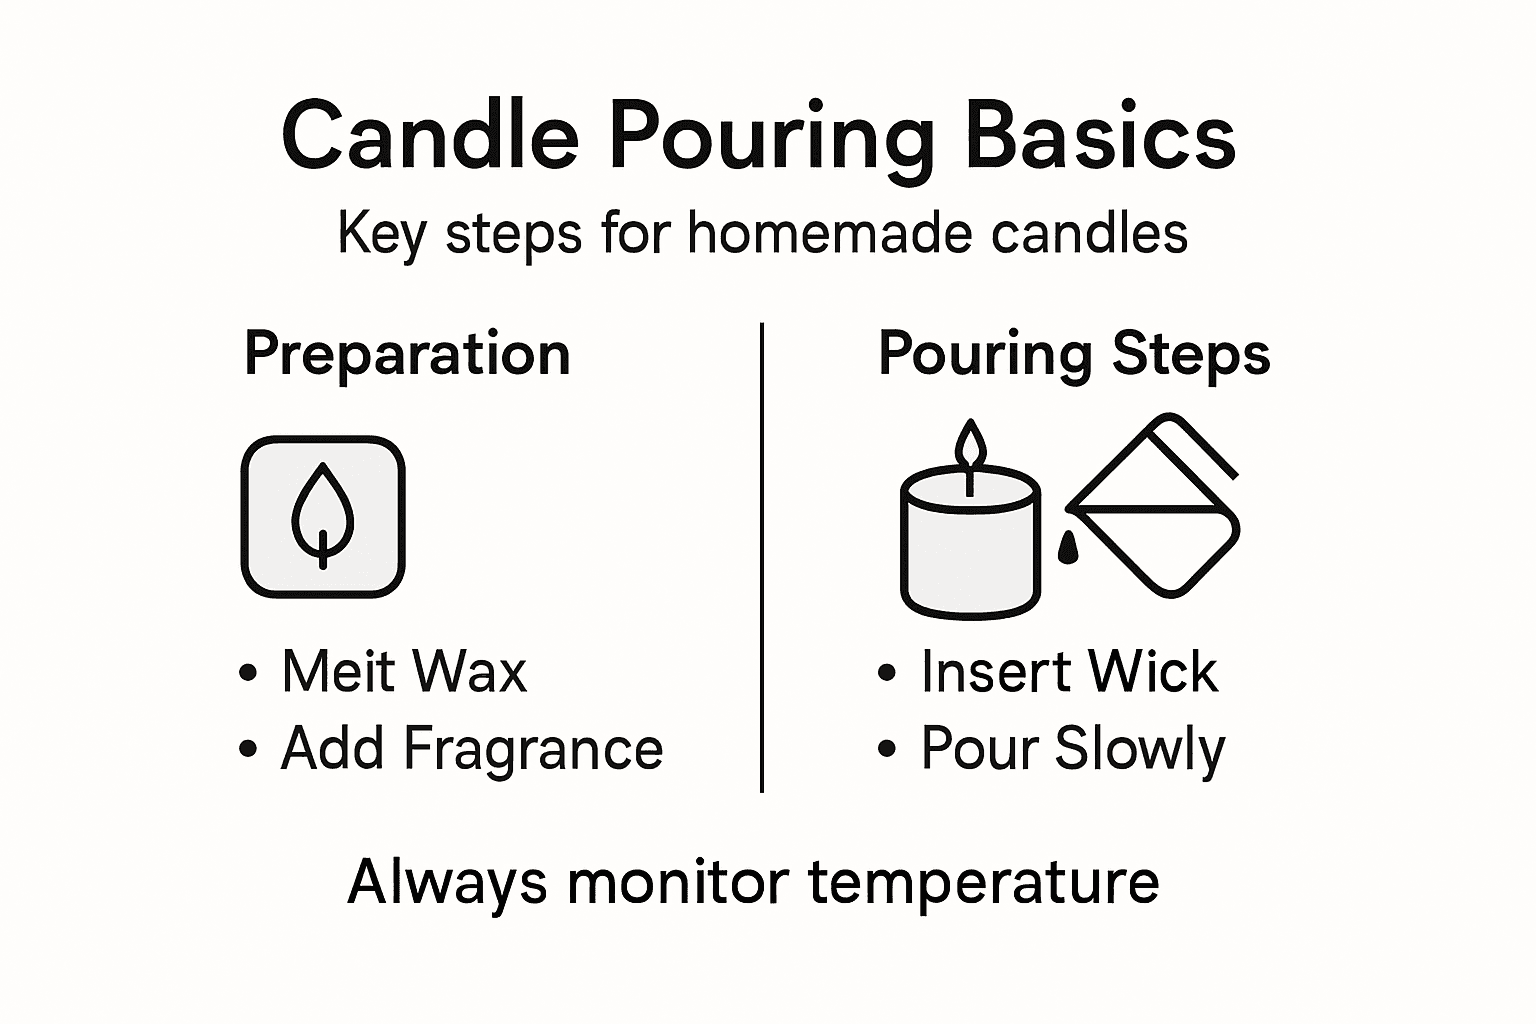
Step 4: Pour and Mold Your Scented Candles
Preparing to pour and mold your candles requires precision and careful attention to detail. Handmade candle techniques involve several critical steps that will determine the quality and appearance of your final product.
Begin by selecting the right type of mold for your desired candle style. Silicone molds work best for beginners because they allow easy release and produce crisp, clean shapes. Prepare your mold by cleaning it thoroughly and securing the wick at the center using a wick holder or pencil placed across the top. Melt your chosen wax in a double boiler, maintaining a consistent temperature between 180 and 185 degrees Fahrenheit. Once melted, add your carefully blended fragrance oils and any desired color, stirring gently to ensure even distribution.
Pour the wax slowly and steadily into your prepared mold, avoiding air bubbles by tilting the container slightly and maintaining a consistent stream. Fill the mold to about a quarter inch from the top, allowing space for potential shrinkage as the wax cools. Let the candle cool completely at room temperature for several hours, resisting the temptation to move or disturb it. After the initial cooling, you may need to top off the candle with additional wax to create a smooth, even surface.
Pro Tip: Place a sheet of parchment paper under your molds to catch any potential spills and make cleanup significantly easier.
Step 5: Test and Refine Your Candle Scents
Testing and refining your homemade candles is the final crucial step in creating a professional quality product. Candle fragrance testing requires systematic observation and careful documentation to achieve optimal results.
Start by conducting controlled burn tests in a draft-free environment. Light multiple candles simultaneously and observe key performance indicators such as melt pool diameter, flame height, soot production, and fragrance throw intensity. Pay close attention to how the scent develops and disperses throughout different stages of burning. Note the time it takes for the fragrance to become noticeable, its strength at various points during the burn, and how consistently the scent remains present. Experiment with different fragrance oil concentrations between 6% and 10% to find the perfect balance that provides a strong yet not overwhelming aroma.
The following table summarizes key metrics to document during candle testing:
| Metric Observed | Why It Matters | Ideal Result |
|---|---|---|
| Melt Pool Size | Ensures even burning | Reaches edges by hour 2 |
| Flame Height | Indicates proper wick sizing | Medium, steady flame |
| Soot Level | Assesses air quality impact | Minimal to none |
| Scent Throw | Measures fragrance strength | Noticeable, pleasant |
Document your testing results meticulously in a dedicated notebook or spreadsheet. Record details like wax type, fragrance blend, wick size, container diameter, burn time, and sensory observations. This systematic approach will help you understand how different variables interact and enable you to make precise adjustments to your candle making process. Consider burning each candle for at least four hours during testing to get a comprehensive assessment of its performance.
Pro Tip: Create small sample candles when testing new fragrance combinations to minimize material waste and save on expensive ingredients.
Elevate Your Candle Crafting with Premium Scents and Supplies
If you have been following our step-by-step guide to mixing scented candles at home you know how important it is to select the right waxes wicks and fragrance oils for your creations. When striving for that perfect burn and captivating scent throw every detail matters from choosing soy or beeswax to blending fragrance notes with precision. Avoid the frustration of inconsistent scent strength or uneven burns by exploring our curated Candles Collection – Aromel where you can find quality candles and inspiration to refine your craft.

Ready to bring your candle experiments to life with beautifully blended scents and professional-grade materials Browse our exclusive Bundles – Aromel that offer great value on fragrance combinations and candle supplies. Take advantage of free shipping on orders over $50 today and enhance your home ambiance with confidence. Discover all the essentials and more at Aromel Scents and start crafting memorable aromatic experiences that will delight you and your loved ones.
Frequently Asked Questions
How do I set up my workspace for mixing scented candles at home?
To set up your workspace, choose a well-ventilated area with a flat, heat-resistant surface. Cover the area with protective materials and gather all your essential tools like double boilers, thermometers, and pouring pitchers to ensure a streamlined process.
What types of wax should I consider for scented candles?
You can choose from several types of wax, including soy, paraffin, beeswax, and blended waxes. For a clean burn and excellent scent throw, soy wax is a popular choice, especially for home projects.
How can I effectively blend fragrance oils for my candles?
To blend fragrance oils, start with candle-safe oils and use a ratio of approximately 30% top notes, 50% middle notes, and 20% base notes. Experiment with small batches and document your findings to refine your scent combinations.
What should I do to ensure my poured candles cool evenly?
Pour your melted wax into molds slowly and avoid air bubbles by maintaining a consistent stream. Allow the candles to cool at room temperature without disturbance to achieve the best finish.
How do I test and refine the scents of my homemade candles?
Test your candles by conducting burn tests in a draft-free space and monitor key metrics like scent throw and flame height. Adjust your formulation based on your observations to enhance the quality of your final product.
What are some tips for ensuring safety while mixing candles at home?
Prioritize safety by using heat-resistant gloves, eyewear, and keeping your workspace free from flammable materials. Always have a fire extinguisher nearby and ensure your work area is well-ventilated to avoid exposure to fumes.